(→Items) |
No edit summary Tag: rte-source |
||
| Line 3: | Line 3: | ||
|page2=Return to the Graveyard:Resurrection |
|page2=Return to the Graveyard:Resurrection |
||
|text1=MediEvil |
|text1=MediEvil |
||
| − | |text2=MediEvil: Resurrection}}{{ |
+ | |text2=MediEvil: Resurrection}}{{Featured article}}{{Infobox level |
|name = [[Speedrunning:Return to the Graveyard|<font color=#FFF>Return to the Graveyard</font>]] |
|name = [[Speedrunning:Return to the Graveyard|<font color=#FFF>Return to the Graveyard</font>]] |
||
|image = [[File:TheGraveyard.png|300px]] |
|image = [[File:TheGraveyard.png|300px]] |
||
| Line 144: | Line 144: | ||
==Books== |
==Books== |
||
| − | {{ |
+ | {{Main|MediEvil_books|l1=MediEvil books}} |
=====Book 1===== |
=====Book 1===== |
||
Who's a clever skeleton then? Remember that there are many more secret areas like this throughout the land of Gallowmere, some offering more than just treasure! |
Who's a clever skeleton then? Remember that there are many more secret areas like this throughout the land of Gallowmere, some offering more than just treasure! |
||
Revision as of 14:19, 9 February 2015
The Return to the Graveyard (墓地の守護神 Bochi no shugoshin) is the fifth level in MediEvil. It's also the second level that features a boss fight.
Walkthrough
Walkthrough by iCABALi
Walkthough by Mirrorstar
Run across the bridge as part of it will fall out and you do not want to fall into the river as that takes what life is in your life meter. (If you get caught on that part of the bridge and you and fall with it, try to jump off of it and onto the bridge.)
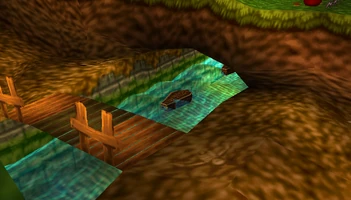
Once that part has fallen, stand at the edge of the hole in the bridge. You will see coffins floating down the river. Drop onto one. (As you try to walk off of the edge, Dan will try to retain his balance, so be ready to push forward again so that you can drop.)
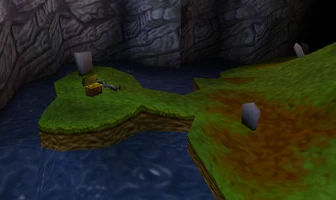
As you come out into view, just before the underpass you cannot pass, there is a place that you can jump onto if you jump towards it. It helps to be facing that way already. Press up on the directional pad an instant before you jump to make sure you jump far enough. Here, you find an Energy Vial, another Energy Vial, and five Chests of Gold. Read the first book.
Walk over to the right, go up the stairs, and follow along the fence. You find a moneybag. Stay next to the fence and walk off of the edge to drop down.
You should notice hands running around. You can smash them with the Club or the Hammer. They are worth two coins each.
Walk up to continue. You can jump onto a small ledge to jump up to a higher area where you will find a moneybag. Then jump back down and continue upward. As the end of this path comes into sight, to the left you can find a chest with a skull and crossbones on it. It has a smart bomb. Jump up to the area to the right to get a Silver Shield from a chest and a moneybag. The Merchant Gargoyle is still here. Drop back down. At the very end of this path, there is an Energy Vial.
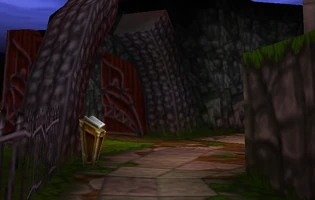
Then, jump up to the left to go that way. As you exit the circular area, jump up onto the strip of grass on the other side of the fence and follow it until you can drop down. It leads you to a Fountain of Rejuvenation. Jump on the gray block and jump over the fence. Get the moneybag. Walk back up the path to the Skull Gates. The second book says the same thing as it did in The Graveyard.
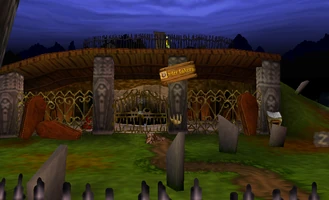
Face the Skull Gates and use the Skull Key from your inventory. Enter this area. You will find a building marked, "Undertakers". Read the third book there.
Walk around on the right. Inch your way across a thin strip of land to get a Chest of Gold. Notice the bridge is out. Go up the hill to find the Star Rune. Return to the "Undertakers" and walk into the yellow hand to use the Star Rune. Get the moneybag on the left and the Energy Vial on the right. Then, go inside.
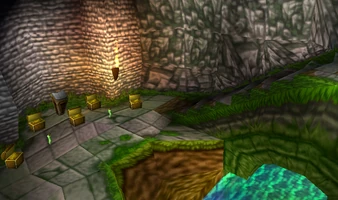
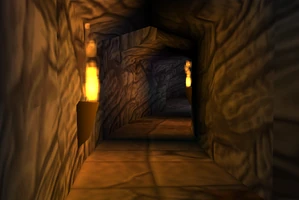
You will find the Chalice, but you are not ready to claim it yet. It does not matter which way you go first. From as you entered the room, go to the right. Walk into the stream of light and jump up.
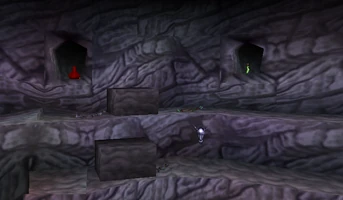
Go to the right. Take the higher path. Jump toward the niche to get the moneybag. You can push the block along to the right. Jump toward the niche to get the Energy Vial. Push the block all the way off the edge, then drop down. Go to the left to find a Merchant Gargoyle. You will also find another block. Push it to the right and all the way off the edge as well. Then, go to the left, do a walking jump over the hole, continue to the left, and jump back inside.
Run back to the original entrance and get the Chalice. Then, go to the left which is the other path. In the beam of light, jump up. Push the block to the left. Jump up towards the niche to get the Energy Vial. Push the block off of the edge.
Now, what you do depends on what you think you can do. From here, you can make a running jump towards the Fountain and you will make it. This makes moving the blocks totally unnecessary. This could have been done from the other side, where you dropped in the first block, as well.
If you want to use the blocks, go back to the right and jump back inside. Run to the original entrance and leave this structure. Go around the hill and go to where the bridge is out. You should see the blocks in the water. Why they float and you do not, I do not know. Do walking jumps to jump from block to block until you can cross over to the other side.
Either way, you will be at a Fountain of Rejuvenation. Do not walk forward from the Fountain until you are sure you are done because the gates will close behind you.
You will then fight the Guardians of the Graveyard. They are two wolves. Run around to try to keep out of their way. They alternate attacking. When they attack, they target you and run at you. For a brief moment after the lunge, the attacking wolf will be completely visible. It is at that moment only that you can hit it. After it attacks, it will run back to circling, so do not get in its way as it is doing that. Both can hurt you if they walk into you.
Whether distance weapons or your Small Sword is best is a personal preference. I would rather use a distance weapon, such as the Crossbow. Then, you just need to be facing the wolf when it is vulnerable instead of right next to the wolf.
When they attack, they can only run so far before becoming visible. So, make sure you are very far away from the wolf that will attack you next. That way, it will be visible before it reaches you which gives you room to try to hit it.
Defeat them and you can then use the "Daring Dash". While running, press the ![]() button. On the way out, talk to the Information Gargoyle.
button. On the way out, talk to the Information Gargoyle.
Hall of Heroes
Talk to Stanyer Iron Hewer once more. You will be given two Chests of Gold.
Characters
Allies
| File:GargChar.png | Information Gargoyles These ugly fellows are often overlooked by all but the wisest of heroes. They do not particularly like Sir Dan, as they know how much of a failure he was when he was alive. Fortunately, Gargoyles can't resist showing of how clever they are and will often give Dan handy hints and clues that can aid him on his quest. |
| File:MerChar.png | Merchant Gargoyles These miserable creatures exist only to drain brave heroes of their treasure. However, they must always offer something in return. If you see one of these merchant gargoyles on your travels, see if they have anything to offer that might be of use to you. |
Bosses
| File:GuardiansBoss.png | These stone wolves have deeply magical powers, dematerializing at will only to regain their fearsome carved stone form moments later. When both ferocious wolves are finally vanquished an adventuring combatant will certainly have earned the right to escape the necropolis. |
Enemies
| File:WolfEnem.png | Wolves These bloodthirsty four legged cornivores can be found roaming wild across the realm. Such is the legendary ferocity of their gnaw and bite attacks that it would be sensible behaviour to try and get a pre-emptive strike in before they pounce. Eating people is tiring work, and often wolves will be seen sleeping off their exertions. |
| File:HeadlessEnem.png | Headless Zombies The lack of head has not prevented these aggressive characters from perfecting a devastating charge attack. This shoulder butt can impart tremendous damage, and so the perceptive adventurer should focus on sidestepping each stampeding assailant before rounding on them to attack fast with the melee weapon of his choice. |
| File:ZomEnem.png | Zombies Your common or garden zombie is a slow witted goon head of monumental proportions. It seems a shame to hurt such feeble minded weapon fodder, but they will likely insist on trying to bar one's progress and eat one's brains. A few well placed sword swipes are the order of the day, which should effectively teach them to mind their own business. |
Speech
- Main article: Speeches in MediEvil
Information Gargoyle (level finish)
| 67 | Information Gargoyle |
All has changed outside the Necropolis. Paths go this way, paths go that way... Nasty painful death waits round every turn and every hill. Bon Voyage! |
Books
- Main article: MediEvil books
Book 1
Who's a clever skeleton then? Remember that there are many more secret areas like this throughout the land of Gallowmere, some offering more than just treasure!
Book 2
The living world lies beyond these Skull Gates. The Master of the Hilltop Mausoleum, the Stained Glass Demon has possession of the Skull Key.
Book 3
Want to be faster on your feet? Want to be able to bash down walls by charging into them? All you have to do is defeat the evil Guardians of the Graveyard and gain this new ability! You will never know why you left the grave without it!
Gallery
| |||||||||||||||||||||||||||||||||||||||||||||||||||||||||||||||||||||||||||||||||||||||||||||||||||||||||||||||||||||||||||||||||||||||||||||||||||||||||||||||||||||||||||||||||||||||||||||||||||||||||


