
The Museum is the first level in MediEvil 2.
Walkthrough[]
Dan is awoken on his tomb and introduced to Winston, the helpful ghost, who advises Dan to find some weapons in the museum...
Run directly from Dan's tomb into the room opposite the hallway. Stand in front of the central glass cabinet and press the ![]() button; Dan will remove his own arm. Press the
button; Dan will remove his own arm. Press the ![]() button again and Dan will hit the cabinet with his arm, smashing the glass. Move forward and collect the sword. Return back into the corridor and turn left, and follow the corridor into the large room with central 'ancient tomb'. Using the sword, chop up the resident zombies, then go inside the central tomb and collect the Museum Key.
button again and Dan will hit the cabinet with his arm, smashing the glass. Move forward and collect the sword. Return back into the corridor and turn left, and follow the corridor into the large room with central 'ancient tomb'. Using the sword, chop up the resident zombies, then go inside the central tomb and collect the Museum Key.
Exit the large room through the rear left archway, and run forward into the next room. Be careful - this room is guarded by huge Green Knights which smash out of their display cases. Dispose of these characters using your trusty sword. (Hint: attack them from behind to avoid their overhead sword chop!). Collect the health vial from in front of the decorated tomb, then run up the stairs and hit the glass display case containing the pistol. Jump on top of the plinth to collect the pistol, then go to the spectral trail on top of the landing and summon Winston. He'll explain how to use the two weapon selections.
Exit the area through the archway next to the Help Ghost, and run along the landing to the left. Smash the chest and collect the shield pick-up. Summon Winston again (his trial is next to the chest), and he explains how to use the shield, and how to do a 'Daring Dash'.
Return back along the landing the way you came, and continue right around, jumping over any gaps. Along the way you can collect a health vial, and three moneybags. Proceed to the closed door, and pass in front of the keyhole. The key you have collected will automatically open the door for you to enter! Run across the landing and summon Winston to learn how to climb up and down ladders and climbable walls. Use the nearby climbable surface and climb up, to the right, and then down the wall into the room below.
Run into the middle of the room where you'll encounter the terrifying Tyrannosaurus Wrecks and three vicious Bonasaurs, which you must then destroy. Avoid getting too close. Shoot them with your pistol by aiming towards them until your green targeting trail hovers over each one. When they are destroyed, the Tyrannosaurus Wrecks will return, causing a statue to topple over - creating a ramp in the process! Run up the ramp to the top, collect the money bag and then stand in the health fountain to top up Dan's strength.
Go through the central door on the landing, and Dan will be faced with two 'Musket Knights' that he must destroy. Shoot them with your pistol and duck behind the central display case as cover against their shot, or defend with the shield pressing the ![]() button to deflect their shot. Exit the area through the door opposite the entrance, and run along the landing and summon Winston. He will explain about the Spivs that cane be used for services and provisions. Move Dan in front of the Spiv and press the
button to deflect their shot. Exit the area through the door opposite the entrance, and run along the landing and summon Winston. He will explain about the Spivs that cane be used for services and provisions. Move Dan in front of the Spiv and press the ![]() button, and the Spiv will open his coat offering provisions. Take this opportunity to top up the pistol with bullets.
button, and the Spiv will open his coat offering provisions. Take this opportunity to top up the pistol with bullets.
Run down the stairs to the landing, where you'll come across some more Bonasaurs. Destroy these as before, and continue into the room at the bottom of the stairs with the central hallway cannon display. To either side of this room are two exits: to the left is the garden; to the right is another gallery in the museum. In the garden, Dan is confronted with some zombies guarding a chest. Smash the chest to collect a Cannon Ball, then return to the central hallway (in this area you'll also find a health fountain and the Chalice of Souls. If you've killed enough enemies you can collect the chalice or else return here later to pick it up).
In the next room opposite the garden, there are two Green Knights in display cases, and a Musket Knight patrolling the area. Destroy these as before, and collect the Torch from in front of the display cases towards the rear of the room.
Return to the central hallway, go over to the cannon, and stand behind and facing it. Press the SELECT button to access the Inventory, highlight the cannonball and press the ![]() button to load the cannonball in to the cannon. Walk over to the burning torch hanging from the wall, then select the torch from Dan's Inventory and use the flames from the wall-torch to light it. Return to the cannon and use the torch to ignite it.
button to load the cannonball in to the cannon. Walk over to the burning torch hanging from the wall, then select the torch from Dan's Inventory and use the flames from the wall-torch to light it. Return to the cannon and use the torch to ignite it.
Enter the exhibition of Creatures of Myths and Legend. Climb up the balcony and run around to collect the key. The musket knights are best tackled from up here, with the Pistol. Climb down and use the key to open the door.
Run Dan forward through the doorway and into the next room. The Tyrannosaurus Wrecks returns and releases more Bonasaurs. Destroy these as before, and run towards the newly-opened door to complete the Museum level.
Dan-Hand[]
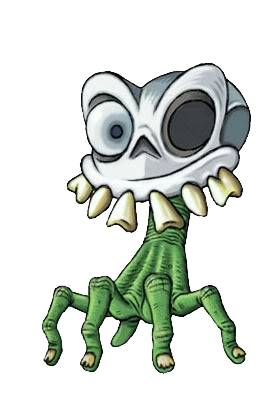
Right after the brawl with the Iron Slugger, Sir Dan gains the ability to remove his head and place it on any of the green hands scurrying about each level. This can help Daniel explore otherwise unreachable areas to collect booty.
The green hands can be found in the main hall, just to the right of your tomb. Position Dan so there is a glowing blue aura around you and the hand, then place your head on it. Just beyond the last bookcase to the left in this main hall is a small crack in the wall. Head inside and you'll find yourself in some kind of storage room.
There's nothing on the ground, so let's get up on the crates. Hop on the smallest one to the left, then make your way across, jumping from stack to stack. Eventually, they will lead to an elevated, fenced off platform. Hop over to it and collect your reward - a Chest of Gold. If you follow it around, you'll find two more.
Head through the opening and you'll find yourself in a new area with piping overhead. Take the stairs to the floor and head to the back of the room. There's a soothing health fountain here. There's also another Chest of Gold tucked in between these two stacks of crates. Jump up the stairs where the health fountain was and slowly make your way across the pipe to the junction ahead. In front of you is a health vial and to the left and right are Chests of Gold - score!
Slowly follow the pipe around to the right side (rotate the camera with the ![]() and
and ![]() buttons to obtain the best angle), grabbing the first Chest of Gold and another one at the far end.
buttons to obtain the best angle), grabbing the first Chest of Gold and another one at the far end.
Now head back (or drop off and take the stairs again) to the junction and follow it around (grabbing the Chest of Gold in the process) to the next stack of crates. From here, carefully jump across the next walkway, then take it to the large hole. Jump on it and see where we land.
You'll find yourself back in the main hall. That's your body straight ahead. Head on over and pull yourself together. Unfortunately, you have to complete the entire level if you want to keep your booty. You can't exit out without losing everything you found.
Books[]
- Main article: MediEvil 2 books
Book 1[]
The legendary Knight Sir Daniel Fortesque. Born around 1250, died 1286 at the battle of Gallowmere. Legend has it that after defeating the evil Sorcerer Zarok at the battle of Gallowmere he rose from the dead a century later to destroy Zarok once and for all. It is said, that in times of great need, he will return again to free the land from evil.
Book 2 - Kraken[]
The great Kraken, that could smash a boat between its fearsome jaws - some still suppose that the deepest seas still hold creatures like this great beast. Fisherman, Phil McCaven, caught this example off the coast of Bognor Regis in 1774.
Book 3 - Zarok monster[]
Despite assuming many monstrous forms, the evil sorcerer Zarok was reputedly a coward. Legend has it that the Great Knight Sir Daniel Fortesque vanquished this creature in 1386.
Gallery[]
")
")
")
")
")
")
")
")
")
![Dan's tomb in Primal. [2]](/wiki/File:PrimalDanstomb.PNG "PrimalDanstomb.PNG (418 KB)")
References[]
- ↑
 MediEvil 2, Lifestyles of the Pharaohs, The Professor's Lab. Developed by SCE Cambridge Studio. Published by Sony Computer Entertainment on April 21, 2000.
- ↑ MediEvil: Fate's Arrow. Written by Chris Sorrell. Art by Jason Wilson. Published by Titan Comics in 2019.
- ↑ "Ever so vaguely inspired by the British Museum in London." — Jason Wilson on Twitter. Published August 22, 2020. Retrieved May 30, 2021.