| “ | Zarok seeks to expand his reach beyond the confines of time. Just think of where he could go. Modern London? Egypt? The possibilities are endless! | ” |
The Time Device (時計仕掛けの城 Tokei shikake no shiro) is the twenty-first level of MediEvil. It was not remade in MediEvil: Resurrection.
Walkthrough[]
Walkthrough by Mirrorstar[]
You start on a path. Be careful not to fall into the void as that will drain what is in your life meter.
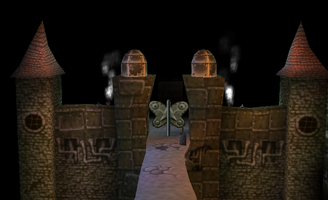
Walk along the path and you will find a butterfly shaped gate. Hit the switch and the gate will open for you. As you enter, you find a GARGOYLE.
You will see tiny, gold clocks flying around. Completely ignore them. Go to the left and do a walking jump over the hole where a clock hand is moving up and down. Time your jump so the clock hand does not hit you. I prefer to jump across when the clock hand is raised.
You should see a path going to the left. You will walk onto the image of a man. Then, walk onto the image of two fish. Do not let the clock hands hit you. You can jump over the clock hands. Next, do a walking jump to the image of a mask. This path leads you past a pendulum. Notice a part of the floor is darker where that blade is hitting it. Inch up to the blade, and as it is rising, walk past it.
This puts you on another image of a mask, only this one has clock hands. This leads to an image of a crescent moon, with clock hands. This leads to an image of man where you can get a SILVER SHIELD from the chest. Finally, the path ends on the other side of a butterfly gate. Take the TIME RUNE. Then, hit the switch to open the butterfly gate.
Jump back across the gap where there is a clock hand and return to the Gargoyle. You should see round brains in the ground. I like to use the larger one that is on the right, while the Gargoyle is in front of you. Jump on the brain repeatedly until you are high enough to land on the master time clock. The master time clock is a huge clock. The Gargoyle is on one of its sides.
From the master time clock, walk up the path and into the gray hand to use the Time Rune. You will come up to another pendulum blade. Walk under it when the way is clear. As you approach the butterfly gate, a clock will appear showing you a time. This time is different from game to game. Take note of the time it gives to you and return to the master time clock.
There are two switches next to the clock itself. Jump on the blue switch to move the blue clock hand. Jump on the gold switch to move the gold clock hand. Move them to the places shown on the clock at the butterfly gate. Go back up the path and to the butterfly gate and the gate should be open.
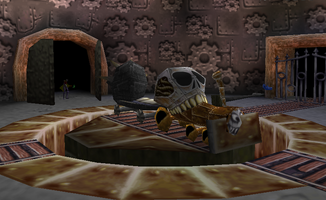
Notice the spinning device in the next area. It has three prongs. The lowest one bothers you while you first enter. Make sure you try to stay behind it or jump over it if it catches up to you. Run in the same direction as the lowest prong spins until you see a space in the wall with a metal square on the floor. Stand on that metal square to be raised up to the next level.
On the next level, you need to jump over the middle prong if it catches up with you. You need to use your shield to duck under the higher prong if necessary.
Once up on the higher level, run to the right until you find a path branching away and take it.
You will find a wide area with two pendulums. You can walk around them. Go to the left and past the third pendulum. You may want to equip a distance weapon, the Crossbow will do, to kill those flying eyeballs before you deal with the rolling disks. Once the eyeballs are dead, run through an opening between the disks and take the CHAOS RUNE. Run back out and walk all the way back to the spinning device.
With the spinning device in front of you, go to the right, past the first path at the metal square, and onto the second path you find. Follow it past a pendulum. You will see a large, gray tube with a metal base. Stand on the metal base and jump up into the tube. This lifts you up to a similar tube on a higher level.
Walk up the stairs and look towards the left. You should see a triangle. Walk onto it and it will move. On the other side, jump off of it to get a BAG OF COINS and another BAG OF COINS. Walk onto the triangle again to return back to the other side where you should jump off of it.
You should see a face on a stone slab. Hit it and it should turn off the red energy. You have three seconds until the red energy is restored. To stop the energy, you must break the circuit. You should see the Chalice in a huge, red crystal. That red crystal is the source of the red energy. In this area, you should see four conductors in 90 degree shapes. Hit the stone slab to turn off the electricity, then hit one of those conductors and it will turn off the red energy. This breaks the circuit so all the red energy is gone.
Walk down both sets of stairs and take the EARTH RUNE which is now free of the red energy. Then, walk up one set of stairs. Either jump up into the gray tube or drop down on the right. Both take you to the same place. Walk the path back to the spinning device.
With the spinning device in front of you, go to the left and take the path at the metal square. Follow the path to the end and read the FIRST BOOK, which is also the only book. Walk into the red hand to use the Chaos Rune. Then enter the keep.
Walk into the green hand to use the Earth Rune. From there, go to the right. Find the handle of the platform for Train and walk into it to push the Train a quarter turn to the right. It should then be facing where you used the Earth Rune. Do a walking jump onto the platform for the Train. Jump onto the Train and it will start.
At the end of this track, you find a BAG OF COINS, another BAG OF COINS, and yet another BAG OF COINS. You also find a large brain. Jump onto it to reach the higher level. There you will find the MOON RUNE and the MERCHANT GARGOYLE.
Drop back down and jump onto the Train and it will take you back to the previous room. Do a walking jump from off of the Train's platform. Soldiers will start to drop into the room from the two small doorways. Kill them first. Then, walk into the blue hand to use the Moon Rune. From there, go to the right and walk into the handle again to move the Train a half circle to the right. The Train should be facing where you used the Moon Rune. Do a walking jump onto the platform and jump onto the Train.
You are dropped off near a FOUNTAIN. From the Fountain, walk to the left until you come to a switch. Hit it. Return to the Fountain. Walk down, then walk to the left until you find another switch. Hit it. Then, return to the Train and jump onto it.
The exit is open, but you are not done yet. Take a walking jump from off of the platform. Then, leave this keep the same way you entered it.
Walk the path back to the spinning device. With this device in front of you, go to the right and onto the first path you find. Walk past the pendulum and jump up into the pipe.
Walk up the stairs. You need to make a complete circuit. Leave the two conductors next to the red crystal in their original positions. Hit the two next to the stone slab so that the four conductors form a rectangle. This will destroy the crystal so you can take the CHALICE.
Go down both sets of the stairs and walk out onto where you took the Earth Rune. Press and hold L2 and R2 and look down. You should see a moon crescent pillar with three chests on it. Back up and make a running jump so that you jump towards this pillar and you are close to the right side of the one conductor as you jump. This is a very difficult jump. For making this jump, you get a CHEST OF COINS, another CHEST OF COINS, and another CHEST OF COINS. If that does not seem worth it to you, return to the master time clock a safer way.
Once on the moon crescent pillar, you should see a path not far from you. Make a running jump to that path. Follow that path either way to return to the master time clock.
With the Gargoyle, at the master time clock, in front of you, go to the right. Approach the butterfly gate and take note of the time you are given. The time changes from game to game. Jump back onto the master time clock and enter in that time. Drop down and enter through the butterfly gate. Since the red energy is gone, you can now take the LIFE BOTTLE. There is also a FOUNTAIN on the right.
Jump back onto the master time clock and enter in the previous time. Walk back to the spinning device. Stand on the metal square to be lifted up and take the path which is there. Return into the keep.
From as you enter, push the handle of the platform a quarter turn to the right. The Train should then be facing the exit. Take a walking jump onto the platform and jump onto the Train.
Books[]
- Main article: MediEvil books
Book 1[]
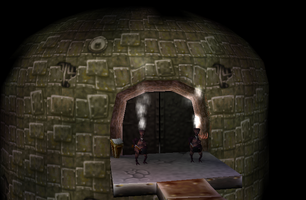
This metal keep houses the magical chariot that Zarok calls his Train. The path it runs along leads eventually to Zarok's Lair, however your route is blocked by gates controlled at various way stations. Travel to these on the Train, open the gates and head for the Lair.
Book of Gallowmere[]
Friendlies[]
Can you imagine how boring it would be to be a sentient being - wise even - and be stuck permanently to a brick wall? No wonder these guys are grumpy.
They pass time by eavesdropping, gossiping, and bad-mouthing any bizarre looking adventurers that might pass by.
Even in medieval times, there were vending machines designed to part a foolish hero from his gold.
Clever customers may qualify for a discount... just don't ask the merchant how he acquires his wares.
Enemies[]
Zarok's mechanical goon squad, developed deep in the City of Madness (although they were manufactured in China, of course).
That coal in their stomach fuels them, whilst also cooking up a mean brisket.
Time really does fly! These clockwork pests will shave minutes off your life with each sweep of their hands.
Staring into their faces will tell you the time of your death. Nothing you don't know already.
Exactly what is a flying eyeball without a flying brain? And without a flying mouth, how can it possibly report what it has seen?
I suppose that must be why they simply try to incinerate you instead.
Gallery[]
Artwork
Screenshots
Trivia[]
- Jason Wilson listed imagery from German Expressionism films such as Algol and Metropolis as inspiration for this level.[1] He also listed the old factory across from the train station in Cambridge as the basis for the level.[2]
References[]
- ↑
 Jason Wilson, Reference and inspiration for the game MediEvil on Facebook. Published November 3, 2014.
- ↑ "Some of the environment designs are influenced by various location[sic] I would see every day in Cambridge. The old factory across from the train station was the basis for the City of madness/Time Device/Train levels." — Jay Gunn on Twitter.
| |||||||||||||||||||||||||||||||||||||||||||||||||||||||||||||||||||||||||||||||||||||||||||||||||||||||||||||||||||||||||||||||||||||||||||||||||||||||||||||||||||||||||||||||||||||||||||||||||||||||||


